Cloud Monitoring
In this activity you will:
- Create a VM Information Source (GCP)
- Create a VM Information Source (AWS)
- Verify cloud API connectivity
The automation tasks we’ve accomplished thus far have focused on deploying the VM-Series firewall and making changes to it externally via the API. We’ll now shift our focus to how PAN-OS can leverage third-party APIs to monitor its environment and automatically respond to changes it observes.
Create a VM Information Source (GCP)
Note
If you are working on the AWS deployment you should skip ahead to Create a VM Information Source (AWS).
We will be creating a VM Information Source on the firewall to monitor the GCP Compute Engine environment for meta-data about the running VM instances. Open a web browser and go to https://<your-firewall-ip>. You will log in with the following credentials.
- Username:
admin - Password:
Ignite2019!
Once you have logged into the firewall, go to the VM Information Sources under the Device tab and click Add.
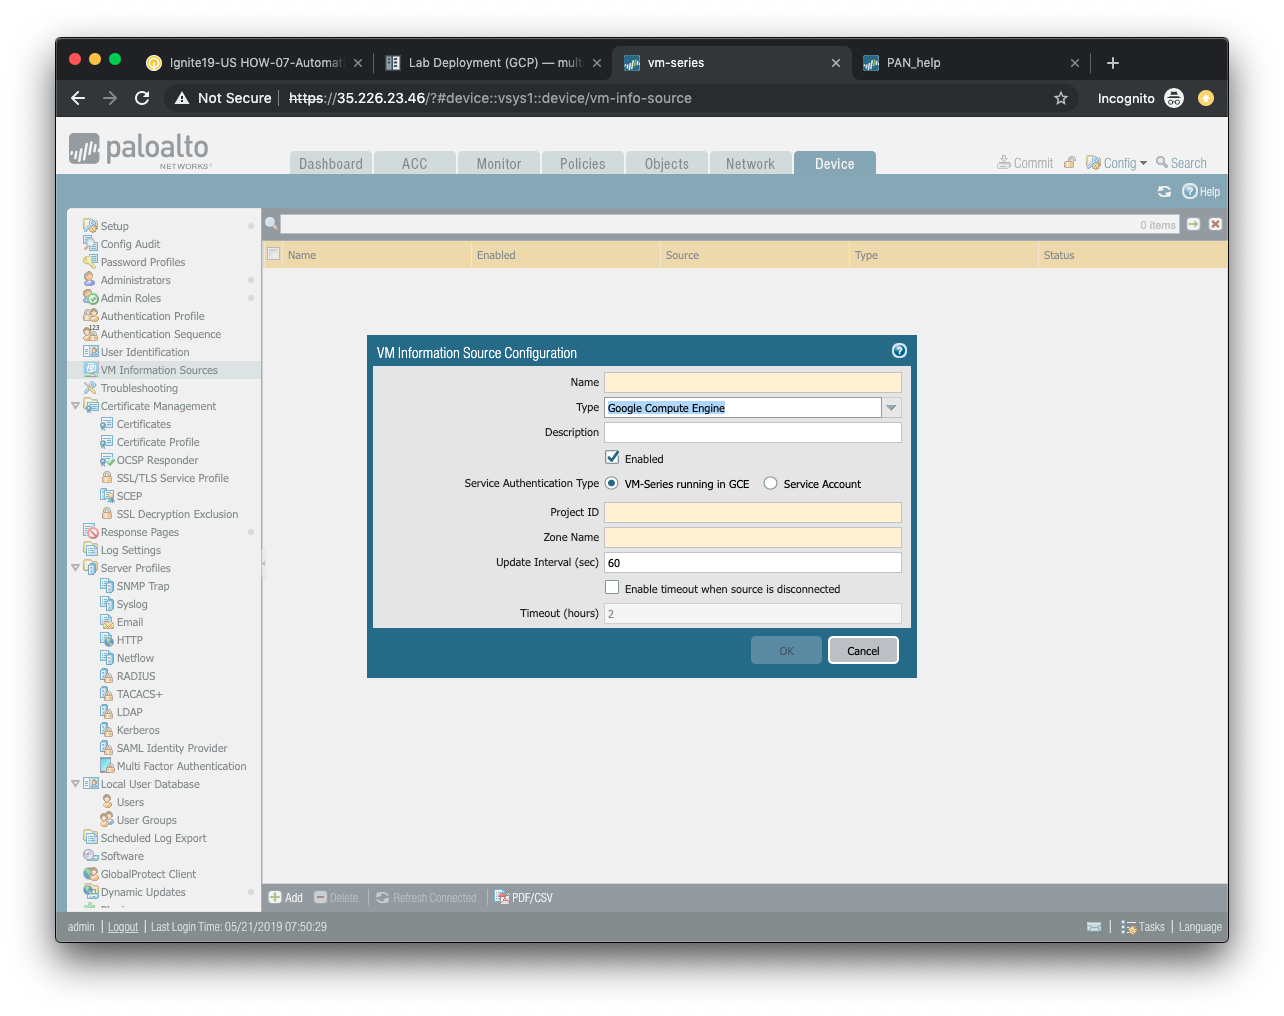
- Provide a name for your monitored source in the Name field.
- Ensure that Google Compute Engine is selected from the Type field selection.
- (optional) Provide a description of the monitored source in the Description field.
- Ensure that the Enabled button is selected.
- Select VM-Series running in GCE from the Service Authorization Type selector.
- The Project ID field will contain the Access Key ID provided in the Qwiklabs portal.
- The Zone Name field will contain the GCP zone in which the lab has been deployed.
- The Update Interval, and timeout fields can keep their default values.
Click OK to accept the configuration.
Create a VM Information Source (AWS)
Note
If you are working on the GCP deployment you should skip ahead to Verify cloud API connectivity.
We will be creating a VM Information Source on the firewall to monitor the AWS EC2 environment for meta-data about the running VM instances. Open a web browser and go to https://<your-firewall-ip>. You will log in with the following credentials.
- Username:
admin - Password:
Ignite2019!
Once you have logged into the firewall, go to the VM Information Sources under the Device tab and click Add.
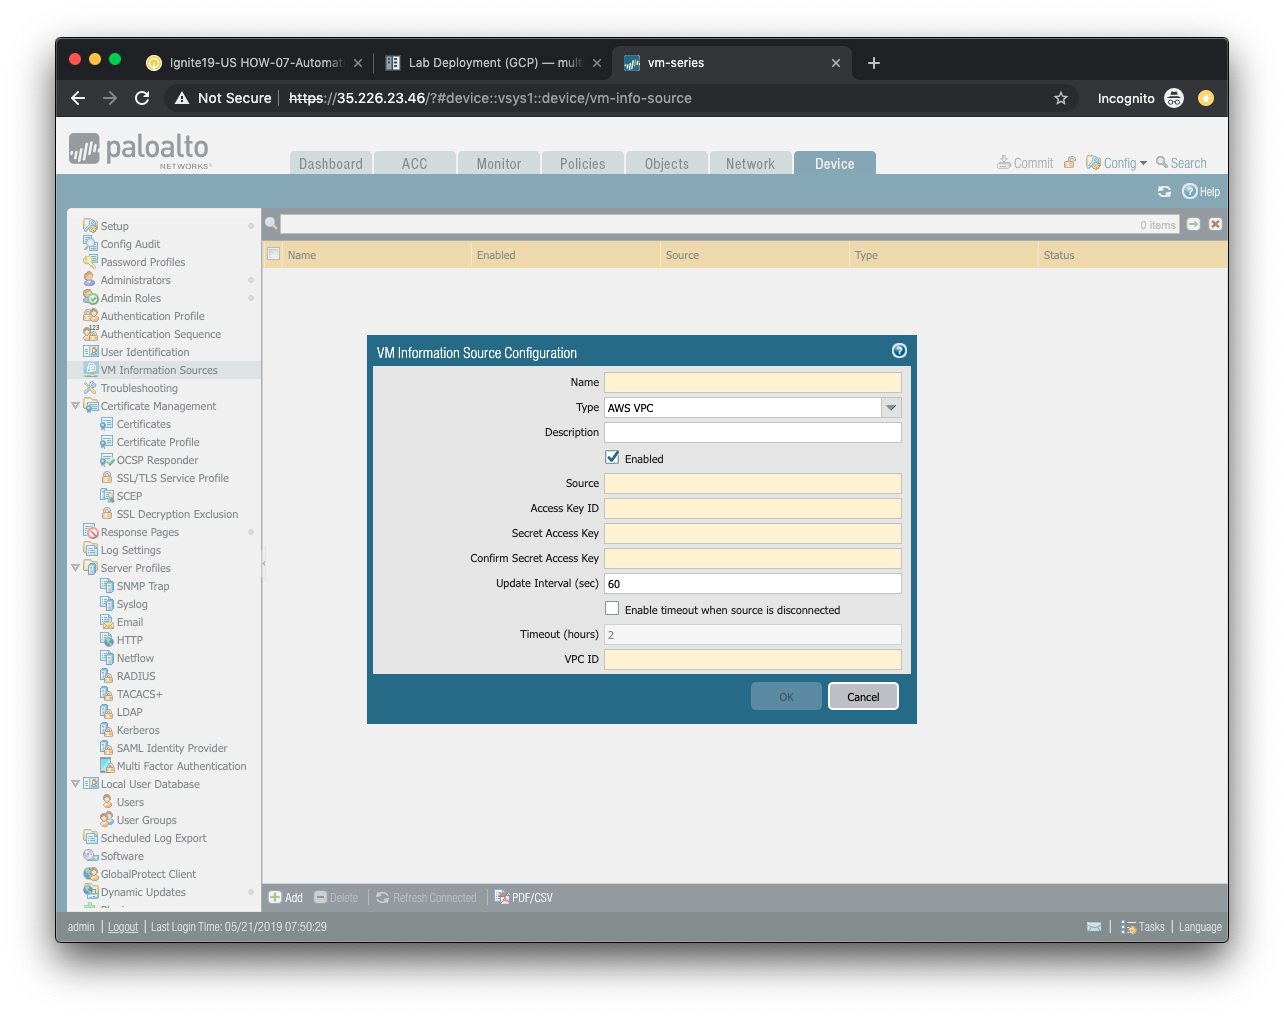
- Provide a name for your monitored source in the Name field.
- (optional) Provide a description of the monitored source in the Description field.
- Ensure that AWS VPC is selected from the Type field selection.
- Ensure that the Enabled button is selected.
- The Source field will contain the URI of the AWS region in which the lab is deployed. The format for this is ec2.<your_AWS_region>.amazonaws.com. For example, if the region is us-west-2 then the URI will be ec2.us-west-2.amazonaws.com.
- The Access Key ID field will contain the Access Key ID provided in the Qwiklabs portal.
- The Secret Access Key field (and confirmation field) will contain the Secret Access Key provided in the Qwiklabs portal.
- The Update Interval, and timeout fields can keep their default values.
- The VPC ID field will contain the AWS VPC value that was output during the deployment phase. You can change into the AWS deployment directory and display the Terraform output values with the following commands.
$ cd ~/multicloud-automation-lab/deployment/aws
$ terraform output
Click OK to accept the configuration.
Verify cloud API connectivity
Click Commit and commit the candidate configuration.
If the VM Information Source configuration was correct, you should see the status indicator for your source turn green.

If the status indicator is green, you can proceed to the next section.